
Practical packing tips for your organized move
Practical packing tips for your organized move
A well-planned packing strategy saves time, reduces stress, and protects belongings from start to finish. At Aloha Moving, organized moves begin with clear timelines, smart materials, and room-by-room systems that make packing, loading, and unpacking faster and easier. Use this guide to structure the process and avoid common pitfalls.

What to Do First
-
Define the move date and create a week-by-week packing plan, starting with rarely used areas like storage, guest rooms, and seasonal closets.
-
Set up a staging zone for materials and finished boxes to keep walkways clear and prevent repacking or mix-ups.
-
Take quick photos of rooms, shelves, and cable setups to replicate layouts at the new home.
Essential Materials Checklist
-
Sturdy moving boxes in small, medium, large, plus dish barrels and wardrobe boxes.
-
High-quality packing tape, tape gun, and box cutters.
-
Cushioning: bubble wrap, packing paper, foam sheets, stretch wrap, and moving blankets.
-
Labels: permanent markers, colored stickers, and room-coded labels.
-
Specialty protection: mattress covers, TV boxes, picture/mirror boxes, and zip bags for hardware.
Labeling System That Works
-
Use a two-part label: Room + Box Number (e.g., “Kitchen 12”) with a brief content summary (“Pots, lids, trivets”).
-
Add a color for each room and place labels on two sides and the top for easy reading from any angle.
-
Keep a master inventory list (digital or printed) that maps box numbers to contents and destination rooms.
| Room | Packing Strategy |
|---|---|
| Kitchen | Pack non-essentials first; use cell dividers for glassware; wrap plates vertically like records; pad pots and stack with paper between lids. |
| Living Room | Coil cables and label; use original TV box when possible; place books in small boxes; protect art in picture boxes with corner protectors. |
| Bedrooms | Use wardrobe boxes for hanging clothes; roll and bag seasonal items; keep a sealed linen set for first night bedding. |
| Bathroom | Tape closed any flip lids; bag toiletries in sealed zipper bags; pack a separate “Day 1” bathroom kit. |
| Kids’ Rooms | Involve children in choosing a small “favorites” bag; pack toys by category; label clearly to unpack these boxes early. |
| Home Office | Back up files; secure documents in a clearly marked “Do Not Load Last” file box; take photos of desk wiring before disassembly. |
Fragile and High-Value Items
-
Double-box extremely fragile items with at least two inches of padding between inner and outer boxes.
-
Use the “shake test”: if anything shifts when gently shaking, add more cushioning.
-
Consider professional crating for large glass, art, antiques, or specialty electronics; discuss coverage options in advance.
Weight, Balance, and Safety
-
Follow the rule: heavy items in small boxes, light/bulky items in large boxes.
-
Keep individual boxes under a manageable weight to protect both contents and floors during handling.
-
Distribute weight evenly; fill gaps with crumpled paper to prevent crushing during stacking.
| Category | Guidelines |
|---|---|
| Disassembly and Hardware Control | Remove legs, shelves, and fragile attachments; wrap each piece together with stretch wrap.
Place screws, bolts, and small parts in labeled zip bags; tape the bag to the corresponding furniture or store in a dedicated “Hardware Box.” Photograph complex assemblies (beds, shelving systems, media units) to simplify reassembly. |
| Protecting Floors, Walls, and Entrances | Use floor runners or flattened boxes to create pathways.
Pad door frames and corners with towels, foam, or corner guards during move-out and move-in. Pre-measure large furniture and confirm elevator or stair clearance to avoid last-minute disassembly. |
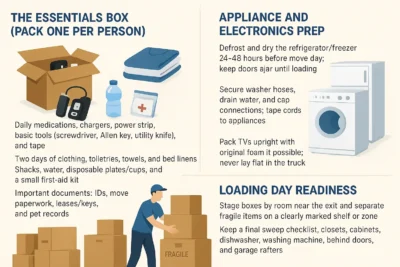
| Category | Guidelines |
|---|---|
| The Essentials Box (Pack One per Person) | Include daily medications, chargers, power strip, basic tools (screwdriver, Allen key, utility knife), and tape.
Pack two days of clothing, toiletries, towels, and bed linens. Add snacks, water, disposable plates/cups, and a small first-aid kit. Keep important documents together: IDs, move paperwork, leases/keys, and pet records. |
| Appliance and Electronics Prep | Defrost and dry the refrigerator/freezer 24–48 hours before move day; keep doors ajar until loading.
Secure washer hoses, drain water, and cap connections; tape cords to appliances. Pack TVs upright with original foam if possible; never lay flat in the truck. |
| Loading Day Readiness | Stage boxes by room near the exit and separate fragile items on a clearly marked shelf or zone.
Keep a final sweep checklist: closets, cabinets, dishwasher, washing machine, behind doors, and garage rafters. Walk the space with the foreman to confirm inventory, special instructions, and placement priorities at the destination. |
Unpacking with a Plan
-
Place boxes directly into their destination rooms using the color/label system.
-
Set up beds first, then bathrooms and the kitchen essentials; save décor for last.
-
Flatten boxes and gather paper in one area for easy recycling or a pickup appointment.
When to Consider Professional Packing
-
Tight timelines, large homes, complex items, or high-value collections benefit from full or partial packing services.
-
Professional packers bring uniform materials, efficient workflows, and itemized labeling that speeds up settling in.
-
Ask about combined packing and moving schedules to compress timelines and reduce downtime.
How Aloha Moving Can Help
-
Customized packing plans: full-service, partial, or fragile-only.
-
Professional-grade materials and specialty crates for delicate items.
-
Organized labeling, room mapping, and coordinated load plans for quicker setup on arrival.
-
Clear communication on timing, access, and coverage options to protect belongings throughout the move.